

Home » Blog » Bags »
How to export shoes 3d model to CLO 3D?
How to export shoes to Clo 3D this is a question that I have faced recently and my trying to find some good explanation or tutorials are failed.
This is a question that I have faced recently and my trying to find some good explanation or tutorials are end up with nothing.
After spending some time on tries and testing I have found a right way how to make it works.
I have spent some time researching, did tests, and after several tries, I found how to export any type of shoe to CLO 3D in the right way.
Today I want to share my knowledge with you and show how to organize materials and prepare models for export in 3ds max, Cinema 4D and Blender and how to register shoe mesh inside CLO 3D.
So this detailed tutorial will cover how to prepare shoe 3D model for export (in 3ds max, Cinema 4D and Blender) and how to register shoe mesh inside CLO 3D.

Also, I’ll describe my mistakes, show the result of these mistakes and explain how to fix them.
- Export an Avatar
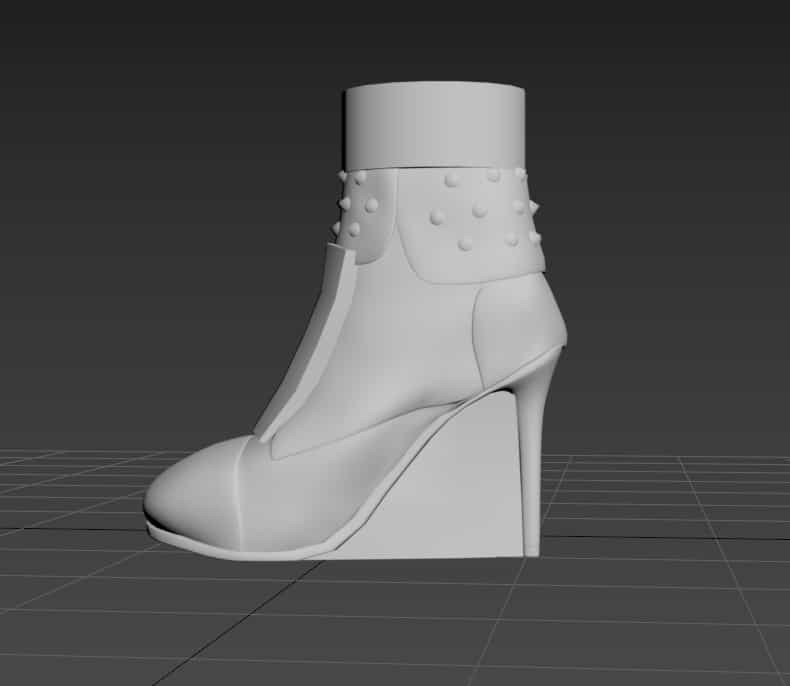
- Export High Heels from 3ds Max
- Mistake #1
- Setting up materials in 3ds Max
- Mistake #2
- Export Flats from 3ds Max
- Export from Cinema 4D
- Export from Blender
- FREE High Heels 3D Model
Start with an avatar!
First, we need an avatar. You can use a standard CLO avatar, DAZ avatars or any custom made avatar.
In this tutorial, I’ll be using a standard CLO3D female avatar.
Go to the File –> Export, and export to FBX or OBJ file format.
After that, open the avatar in the 3D program.
Export shoes to Clo 3D from 3ds max
Let’s start from 3ds max. When you created a shoe, you have to match it to the avatar.
Next, you have to name each model.

The right shoe has to be shoes_r, and the left one shoes_l.
Based on these names CLO 3D understand which one right and left.
2nd important thing – the pivot of each geometry should be placed in the center of the coordinate system or origin (0;0;0). Let’s say, for example, during the modeling, the pivot was placed at the center of the object.

But we need to place the pivot to the origin. In 3ds Max, you can go to the Hierarchy tab and press Affect Pivot Only.

Set up x,y,z position to 0 for the pivot and press Affect Pivot Only one more time to finish this command.

Repeat the same process for the left shoe.
Mistake #1
By my 1st try – I have matched shoes to the avatar, create proper names, placed pivot to origin but created only one material because I have one texture for the whole model.
Let me show what result you will get if you be exporting shoe models in the same way.
In CLO 3D got to the Avatar menu and select Register Hair/Shoes.

Select shoes checkbox and what type of shoes you want to export. In my case, I’m exporting Heels. Select FBX file, I start from the wrong shoe model to show you the result of a model with one material.

And select a Thumbnail, and press create.
CLO will ask you where to save the file. I save the file to the same directory where these standard pair of shoes exist.
You can find this directory my clicking right mouse button on the shoe thumbnail and click Copy the Path.

Wait till the calculation is finished. You will get a notification that Shoes are complete. Close this window and click Refresh button.

Now we see the shoe icon and can use this model.
At first glance, it looks pretty normal and fits avatar very well.
But if I switch to the Show X-ray Joints (Shift+X) mode.

Grab Toe Bone and start rotating this bone, you can notice that this bone controls only the avatar’s toe, but the shoe’s nose is not moving.

And if I grab an Ankle bone, the whole shoe is moving, even the top part of the shoe.

Let’s select standard high heel shoes. Go to the X-ray mode, click the Toe bone, and start rotating. You can see that this bone controls not only the avatar but the shoe as well.

It also affects an animation, lest add motion. Go to animation and move over a timeline. You can see that legs are intersecting both shoes.

And the back area has the same issue.
We can avoid this issue by creating the right material structure.
Setting up Materials before export shoes to CLO 3D
This is a 2nd important thing of preparing shoes for the export.
Below is an example how our material should look like.

The correct materials organization will tell CLO3D which bone should control a specific part of the shoe.
We need a Multi/Sub-Object Material.
The 1st material will be for the dummy. Dummy, it’s an additional geometry that covers problem parts of your shoe model, like space between shoe and heel, shoelaces and the top of the shoes around the ankle.

If the avatar has a long dress or skirt, during animation, parts of the cloth can intersect with the shoe in the wrong way.
So, no matter what geometry you have, the 1st one in the list should be a dummy.
Also, we have to apply tramsparency.png texture in the Opacity slot.

To find the directory, select a standard shoe, click on any part of the shoe and hang your mouse over the texture slot.
You will see the directory address. And if you click on the texture, you will be able to find this transparency.png texture.

Any other materials should be placed under the dummy material.
And the last one, it’s crucial, should be Heel material.
No matter what texture you use for the heel, even if you use the same texture as the shoe body has, you still have to create a separate material for the heel part.
Let’s say it’s the final stage of your model and you are ready to set up materials.
I detach all dummies and create simple materials. Material number 1 will be pink and 2nd one will be green.
Next, click on the dummy and press attach the shoe to the dummy. 3ds max will create Multi/Sub-Object material.

The 1st one will be a dummy.
Next, add as many materials as you need for your model.
2nd one maybe the shoe or any other part. Next one I’ll create for metal.
ID #2 will be shoe body. If I want to make spikes metal, I select all of them and set up ID #3.
The last one will be a heel.
Just select the heel and add material ID #4

And our model is ready for export.
But before we do that, one more word about dummies.
Dummies help you to cover problem spots of the shoe. And they should have middle dense poly count.
Let’s say if I want to cover the shoelaces area, I create a cube primitive, and leave it as it is without adjustments.

The cloth still can intersect with this dummy because it has a huge polygon area, and it’s not enough information for the proper collision.
We need to add more sections to this geometry by adding more edges.
So, in the end, it should look like this.

But don’t go too crazy and don’t create a very dense mesh.
When you finished the shoe, use this checklist:
✅ Set up geometry pivot to the origin
✅ Create dummies
✅ Create proper materials structure
Open CLO3D and register the shoe one more time.
Go to Avatar – Register Hair/Shoes, select shoes, Heels type, select fbx file, and thumbnail.
After calculation, press the Refresh button.
Now we have different materials. I can select spikes and adjust material type and parameters.
In 3ds Max, it’s ID #3 Metal material. I can change the material type to metal and adjust the color.

The same for the 2nd shoe. Also, I can change shoe body material type to leather and adjust parameters.
Next, I can change the heel material type to plastic.
Now we can test these shoes, turn on X-ray mode, and test bone rotation.

We can see that toe bone controls not only an avatar but a shoe’s nose as well. Let’s apply motion. Go to the Animation and play the timeline.

As you can see shoe's geometry moves properly, without any intersections and all bones control the right parts of the shoe.
So materials that we created send information to CLO, and it understands that our last material defines the heel part, the 1st material determines dummies, and everything in between these two materials belongs to shoe geometry. This is the most important part.
Mistake #2
Okay, let’s take a look at one more example of my mistake.
I have created shoe geometry with dummies and make the proper material structure.

The 1st material is a dummy, and the last one is a heel material.
But I forgot to assign the heel material to a heel geometry.
So my heel geometry left with the Material ID #3 that belongs to the Sole material.

And here is a result in CLO3D. Select shoe and switch to the X-ray mode.
The toe bone was working well.

But when I selected the ankle bone and started rotating, I noticed that the buckle geometry moves with this bone apart from the shoe’s strap.

It happened because the last assigned material in the list was a Metal material assigned to the buckle.
And CLO3D thought that the buckle is a heel because the heel material wasn’t assigned to any geometry.
To fix this, I just selected the heel geometry and changed the material ID.
And here is a result with the correct settings. Now when I do rotation, the buckle stays with the strap, and all parts move properly.

And the final check with the animation. Apply a motion open animation window and roll over the timeline. The animation looks smooth without any intersections and issues.
Export flat shoes to Clo 3D
Now let’s discuss a situation when you need to export a flat shoe. I’ll be exporting this pair of boots.

The main rule – when you export the flat shoes, you need to select a standard flat shoe before exporting your model.
Let me show you what will happen if you export flat shoes when your avatar in the high heel state.
Go to the Avatar menu, Register Hair/Shoes. Select shoes, Flats, and choose the FBX file and Thumbnail.
And when I click on the shoe, I’ll get this awkward result.

CLO is trying to match our flat shoe geometry to the leg’s high heel position.
So before exporting your flats, switch to the flat position by selecting standard sneakers and only then register a new shoe.

I repeat registration one more time with the avatar in a flat legs position. And replace a previous file.
After completion, we can apply a new model, and it will perfectly match the avatar.

Let’s jump to the material setup. The structure is exactly the same as we did for the heels.
1st goes dummy, 2nd one is a shoe, and the last one is a heel material.

Even if you have a minimal heel or your model doesn’t have a heel geometry. Just select bottom polys and assign the heel material. It’s very important for CLO 3D to understand the shoe structure and which bone will control geometry’s vertexes.
Export shoes to Clo 3D from Cinema 4D
Now I want to discuss exporting from Cinema 4D.
Let’s say this is your finished model with the dummies but without materials.

To apply material for the dummies, just select your shoe, go to the polygons. Select all dummies by double click on them. Then just drag and drop material on the selection.

Then I invert the selection by pressing U+I. And apply Leather material.
Next, I select spikes and apply Metal Material. Then I copy material and rename it to the Heel.
Select the Heel polys and apply Heel material so it will be our last one on the list.
This is it, repeat the same for the 2nd shoe, and they are ready for export to CLO3D.

Export shoes to Clo 3D from Blender
Finally, how to export models from a Blender.
When models are finished, go to the Shading tab.

Select Material Properties. And create all materials that you need.

The structure will be the same as in 3ds max. The 1st one will be material for dummies with the transparency.png file connected to the Alpha slot.
Next goes any material that you want to apply to your shoe. And the last one will be a heel material.
To create a new material, select an object. If you didn’t apply any material yet, this area would be empty.
Just press the + icon, and a new material slot will be created.

And press new to create a new shader.

When everything is setting up, go to File – Export to FBX.
That’s it! The process of exporting shoes to Clo 3D is pretty simple if you are following this checklist:
✅ Place geometry's pivot in the origin;
✅ Create dummies that will cover problem parts of the model like space between shoe and heel, shoelaces and the top of the shoes around the ankle;
✅ Organize correct materials structure – 1st should be material for a dummy with the transparency.png file connected to opacity or alpha. The last one should be material for the heel, and other materials should be placed in between these two materials.
Download Free High Heels 3D Model
So this is it. Now you know how to export your own shoe model and register it in CLO3D in the right way to avoid any issues.
Use your creativity, create interesting shoes and share your results!
If you have any questions, I’ll be happy to answer them in the comments below this post ⤵️
Don’t hesitate to place comments, questions, and your opinion about this tutorial and my explanations.
Thanks for for reading this article. Have a good time, and see you in the next tutorial!
Great tutorial its a eye openers. By any chance do you have zprj file of these Red heels?
thanks for the cool tutorial. I downloaded shoes models from cgtrade. after exporting the shoes avatar and applying to the model.when I pose the model or animated some parts does not move with the toes. they remain in the same position.
1. экспортировать аватара с обувью в OBJ или FBX файл
2. открыть любым 3D редактором и подвинуть обувь
3. экспортировать обратно в FBX
4. зарегистрировать модель в CLO еще раз
Да, CLO понимает только пути на английском языке.
Если у вас программа установлена в папку, которая содержит кириллические символы то программа не сможет прочитать путь к новым файлам.
Для решения, нужно создать отдельную папку, например на диске C:\
Сохранить в нее файл а потом добавить ее в CLO:
*I have checked fitting in clo imported as avatar and its a perfect fit .
To answer your question please let us know what version of Clo do you use?
And share a Dropbox link with the avatar and shoe model so we can test and provide a solution for your case.
You need to do next steps:
• export the model to obj file format;
• open in any 3d program;
• re-name the right and left shoe
• add materials;
• export to FBX;
• register shoes in CLO via the Avatar menu.
За туфельки отдельное спасибо!!!
Comments are closed.